I saw this idea somewhere - I can't claim it as my own! - and I wanted to give it a try. I'm a sucker for anything that has my girl's handprint on it! I tweaked it a bit so it's not exactly like the original. Here's how it all happened...

1. First, I gathered all the supplies - Mod Podge (one of my favorite craft supplies), brushes (to apply the Mod Podge), brown fabric, scrap green fabric, burlap, and foam board.


2. Next, I covered the foam board with burlap. I think the original called for canvas board, but I opted for foam board because it was cheaper and the finished project looked the same. As you can see, I used my 15 year old stapler to do the covering.


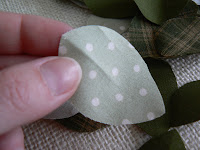
3. Cutting out the little leaves was the part of the project I disliked the most. I used several different scraps of green fabric the make the leaves of the trees. You can cut them any size or shape you want.

4. After I had all the leaves cut out, I began attaching them to the burlap covered boards with the Mod Podge. I didn't have a particular design in mind - I just glued until I had the look of the tree I wanted.

5. I failed to take a picture of this step, but I traced the girl's hand and arm on the brown fabric. Then I cut out their hand and arm. After I had the leaves on the board the way I wanted them, I used Mod Podge to attach the "trunk."
I made one for each of the girl's hands. I thought these trees were adorable and a fun, personalized addition to a room. The girls were able to help create these which makes anything I do a little more special!

These are too cute! You are so crafty :)
ReplyDeleteI also saw the album on FB where you used a large D, A, and Y to spell out 'Daddy' and took pics of the girls with each letter. I'm thinking of 'borrowing' (ha!) that idea for this Father's Day. Where did you get the large letters?